
'%20x='0'%20y='0'%20height='100%25'%20width='100%25'%20%0A%20%20%20%20%20%20%20%20%20%20xlink%3Ahref='data:image/jpg;base64,/9j/2wBDAAYEBQYFBAYGBQYHBwYIChAKCgkJChQODwwQFxQYGBcUFhYaHSUfGhsjHBYWICwgIyYnKSopGR8tMC0oMCUoKSj/2wBDAQcHBwoIChMKChMoGhYaKCgoKCgoKCgoKCgoKCgoKCgoKCgoKCgoKCgoKCgoKCgoKCgoKCgoKCgoKCgoKCgoKCj/wgARCAAHAAoDASIAAhEBAxEB/8QAFQABAQAAAAAAAAAAAAAAAAAABgj/2gAIAQEAAAAASTf/AP/EABQBAQAAAAAAAAAAAAAAAAAAAAL/2gAIAQIQAAAAP//EABQBAQAAAAAAAAAAAAAAAAAAAAL/2gAIAQMQAAAAX//EAB8QAAEEAgIDAAAAAAAAAAAAAAIBAwQRBSEAEhMicf/aAAgBAQABPwDPZmTEwAx4cxlHY7VA+TS9vKg6O90t75MzTr0t91w/czIi6uEiWq/Of//EABYRAQEBAAAAAAAAAAAAAAAAAAEAIf/aAAgBAgEBPwB1v//EABYRAQEBAAAAAAAAAAAAAAAAAAEAEv/aAAgBAwEBPwADN//Z'%3E%3C/image%3E%3C/svg%3E)
The sun salutation or surya namaskar is a set of 12 powerful yoga poses. The surya namaskar is known to have a hugely positive effect on the body and mind, in addition to being a great way to work out the heart and lungs.
The sun salutation is best done first thing in the morning before you have had anything to eat. Each round of a sun salutation has two sets, and each set has 12 yoga positions. There might be more than one way to do the sun salutation, but for the best results, it's best to stick to one version, and practice it regularly.
Sun Salutation Pose: Tips and Technique
Check out how to do a Sun Salutation below.
Step 1: Pranamasana
Stand on the edge of your mat with your feet together, and put the same amount of weight on each foot. Relax your shoulders, and open up your chest. As you take a breath in, lift both arms up from your sides. As you breathe out, bring your palms together in front of your chest like you're praying.
Step 2: Hastauttanasana
As you take a deep breath in, lift your arms up and back, keeping your biceps close to your ears. In this pose, the goal is to stretch the whole body from the heels to the tips of the fingers.
To make this yoga stretch deeper, you can move your pelvis forward a bit. Make sure to reach up with your fingers instead of bending backward.
Step 3: Hastapadasana
As you let your breath out, bend forward from the waist while keeping your back straight. As you let out your breath, bring your hands to the floor next to your feet.
To get more out of this yoga stretch, bend your knees, if you need to, so taht you can put your palms on the floor. Try to gently straighten your knees. It would be best to keep the hands in this position and not move them till the sequence is done.
Step 4: Ashwa Sanchalanasana
As you take a deep breath in, push your right leg as far back as you can. Put your right knee down and look up. If you want you deepen the stretch, make sure the left foot is right in the middle of the hands.
Step 5: Dandasana
As you breathe in, move your left leg back, and straighten your whole body. If you want to deepen the stretch, keep your arms straight up and down.
Step 6: Ashtanga Namaskara
Bring your knees slowly to the floor, and let out a breath. Slightly move your hips back; slide forward, and put your chest and chin on the floor. Raise your backside a bit. Eight parts of the body should touch the floor: both hands, both feet, both knees, the chest, and the chin.
Step 7: Bhujangasana
To do the cobra pose or bhujangasana, slide forward, and lift the chest up. In this pose, you can keep your elbows bent and shoulders away from your ears. Look at the top of the room.
Tip: To get more out of this yoga stretch, push your chest forward gently as you breathe in, and push your belly button down gently as you breathe out. Put your toes together. Make sure you stretch as far as you can without pushing your body.
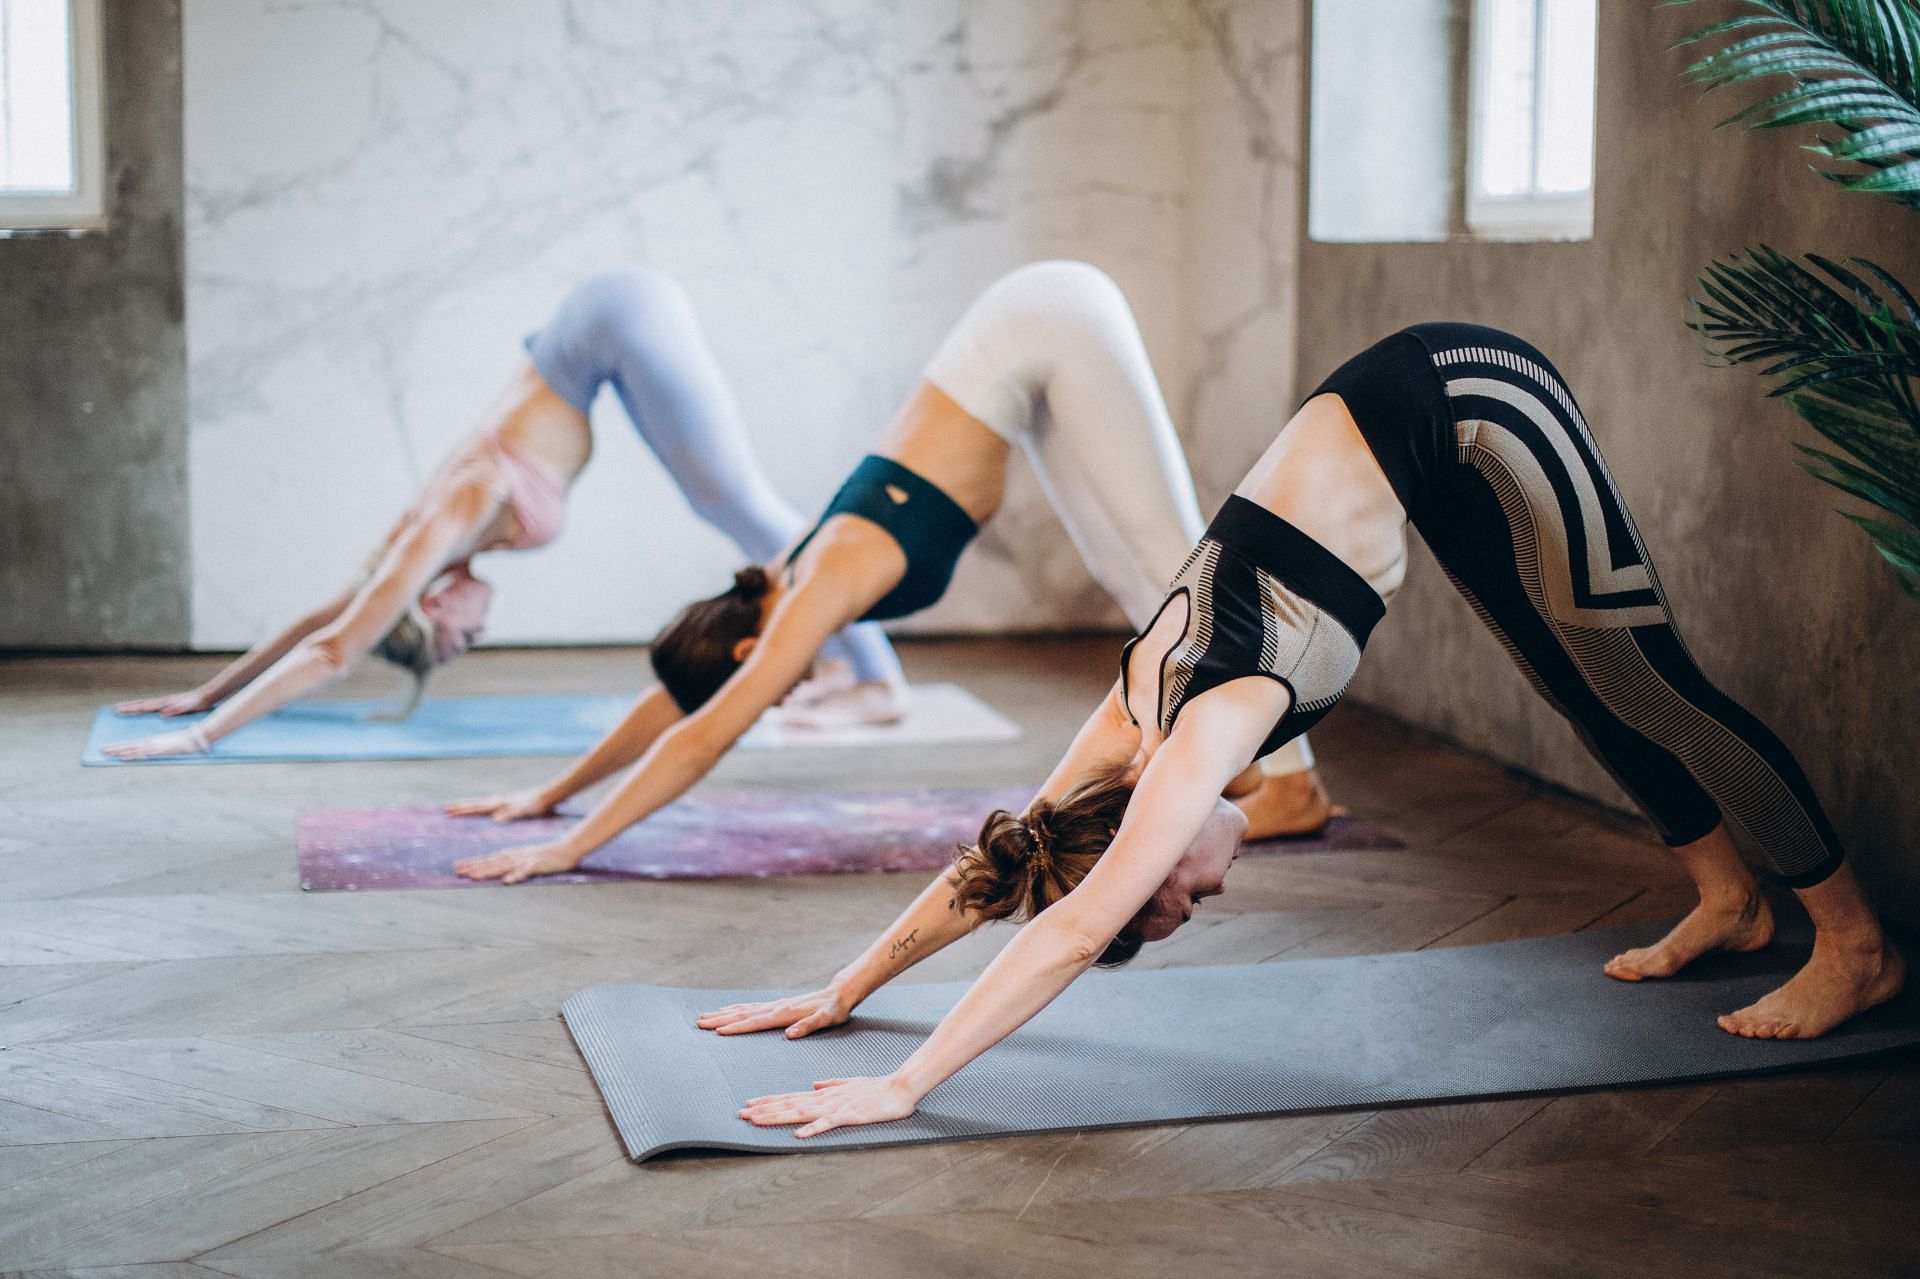
Step 8: Adho Mukha Svanasana
As you let your breath out, lift your hips and tailbone up to make an upside-down 'V' shape with your body.
Tip to get deeper into this yoga stretch: If you can, try to keep your heels on the ground, and make a gentle effort to lift your tailbone up.
Step 9: Ashwa Sanchalanasana
As you take a deep breath in, move your right foot forward between your hands. The left knee should touch the ground. Put pressure on the hips, and look up.
Tip: To make this yoga stretch more intense, put your right foot between your hands and the right calf perpendicular to the floor. In this position, you can deepen the stretch by gently pushing your hips down towards the floor.
Step 10: Hastapadasana
As you let your breath out, move your left foot forward. Keep your hands on the ground. If you need to, you can bend your knees.
Tip: To make this yoga stretch deeper, gently straighten your knees, and try to touch your nose to your knees, if you can. Continue to breathe.
Step 11: Hastauttanasana
As you take a breath in, roll your back up. Raise the hands up, and lean back a bit, pushing the hips out a little bit.
Make sure the biceps are next to your ears to make this yoga stretch deeper. The point is to stretch up more instead of backward.
Step 12: Tadasana
As you let out your breath, straighten your body, and lower your arms. Relax in this position, and pay attention to how your body feels. That completes one sun salutation.
Repeat the steps again to complete the set. This time, start by putting your left foot behind you in step 4 and right foot in front of you in step 10.
Benefits of Surya Namaskar
There are numerous health benefits to performing the sun salutation, some of which are listed below.
- Keeps the heart and lungs healthy.
- Gets the nervous system going.
- Helps the muscles stretch, flex, and get toned.
- Helps lose weight through exercise.
- Makes the immune system stronger.
- Improves brain functions.
- Improves overall health, makes the body stronger, and relaxes the mind.
Takeaway
If you have hurt your back, arms, shoulders, or hands, you shouldn't do the sun salutation. If you just had surgery on your belly or are pregnant, you should talk to your doctor before doing the sun salutation, especially the chaturanga dandasana, which could put pressure on your belly.
If you feel any strain on your lower back in the upward facing dog, lower yourself to a low cobra, or skip it altogether. Move from a low plank to a high plank and back to a downward dog position. As a bonus, you will also work out your upper body and core more.
