

'%20x='0'%20y='0'%20height='100%25'%20width='100%25'%20%0A%20%20%20%20%20%20%20%20%20%20xlink%3Ahref='data:image/jpg;base64,/9j/2wBDAAYEBQYFBAYGBQYHBwYIChAKCgkJChQODwwQFxQYGBcUFhYaHSUfGhsjHBYWICwgIyYnKSopGR8tMC0oMCUoKSj/2wBDAQcHBwoIChMKChMoGhYaKCgoKCgoKCgoKCgoKCgoKCgoKCgoKCgoKCgoKCgoKCgoKCgoKCgoKCgoKCgoKCgoKCj/wgARCAAGAAoDASIAAhEBAxEB/8QAFQABAQAAAAAAAAAAAAAAAAAABAb/2gAIAQEAAAAARC//xAAUAQEAAAAAAAAAAAAAAAAAAAAF/9oACAECEAAAABP/xAAUAQEAAAAAAAAAAAAAAAAAAAAE/9oACAEDEAAAAGf/xAAfEAACAgEEAwAAAAAAAAAAAAABAgMEEQAFBhMSM4H/2gAIAQEAAT8A5JyaeTuo9UNS7IkoaWtH6/FA5KOTnPwatVd3hszRnergKOVwsrY1/8QAGREAAgMBAAAAAAAAAAAAAAAAAgMABBEh/9oACAECAQE/ABstb0y2f//EABcRAQADAAAAAAAAAAAAAAAAAAEAAgP/2gAIAQMBAT8AzqBP/9k='%3E%3C/image%3E%3C/svg%3E)
Looms are an interesting workbench in Minecraft. They allow the player to apply patterns or colors on the banners they collect or make in the game. Looms can be crafted by the player, or found near Shepherd villagers in any village in the vast world of Minecraft.
Banners are unique items in Minecraft that can be crafted and customized on a Loom. Every banner can be dyed into a variety of colors or decorated with banner patterns and can be placed anywhere the player wants, like hanging it on a wall, or making it stand on the ground. Here's a guide on how to craft custom banners in Minecraft.

Steps to crafting custom banners in Minecraft
Default banners
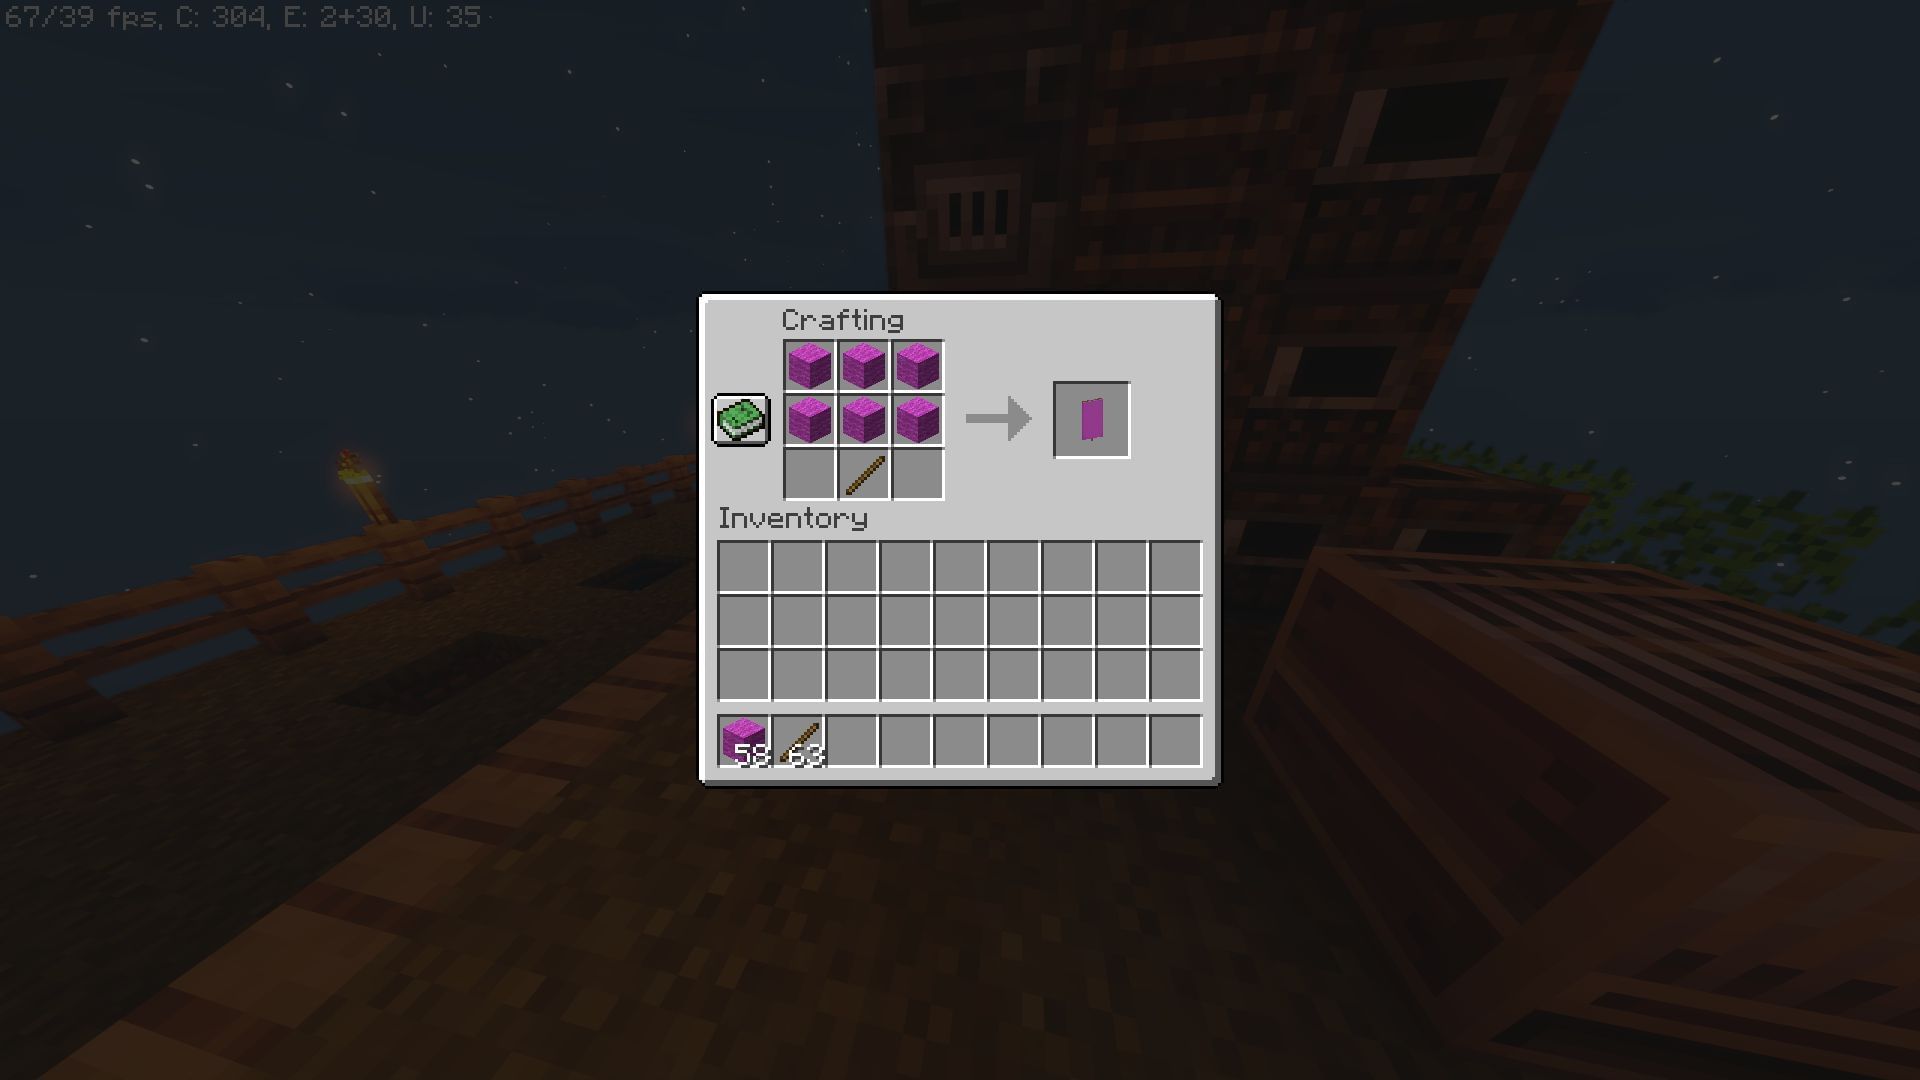
The base version of a banner is made on a Loom, using six pieces of colored (or white) wool and a stick. The recipe can be found below.
In Minecraft’s Bedrock and Education editions, players can remove the color of a banner and change it to white by using bleach on the banner. However, this feature is not available for Minecraft: Java Edition players. In Java Edition, once a colored banner has been crafted, its color cannot be changed.
While banners consisting of one color can be crafted and are appealing to look at, many players want to add a personal touch to them by creating their own custom patterns and applying them on their banners. Since banners can also be applied to shields, players may want to use this feature to customize their shields.
Crafting customized banners
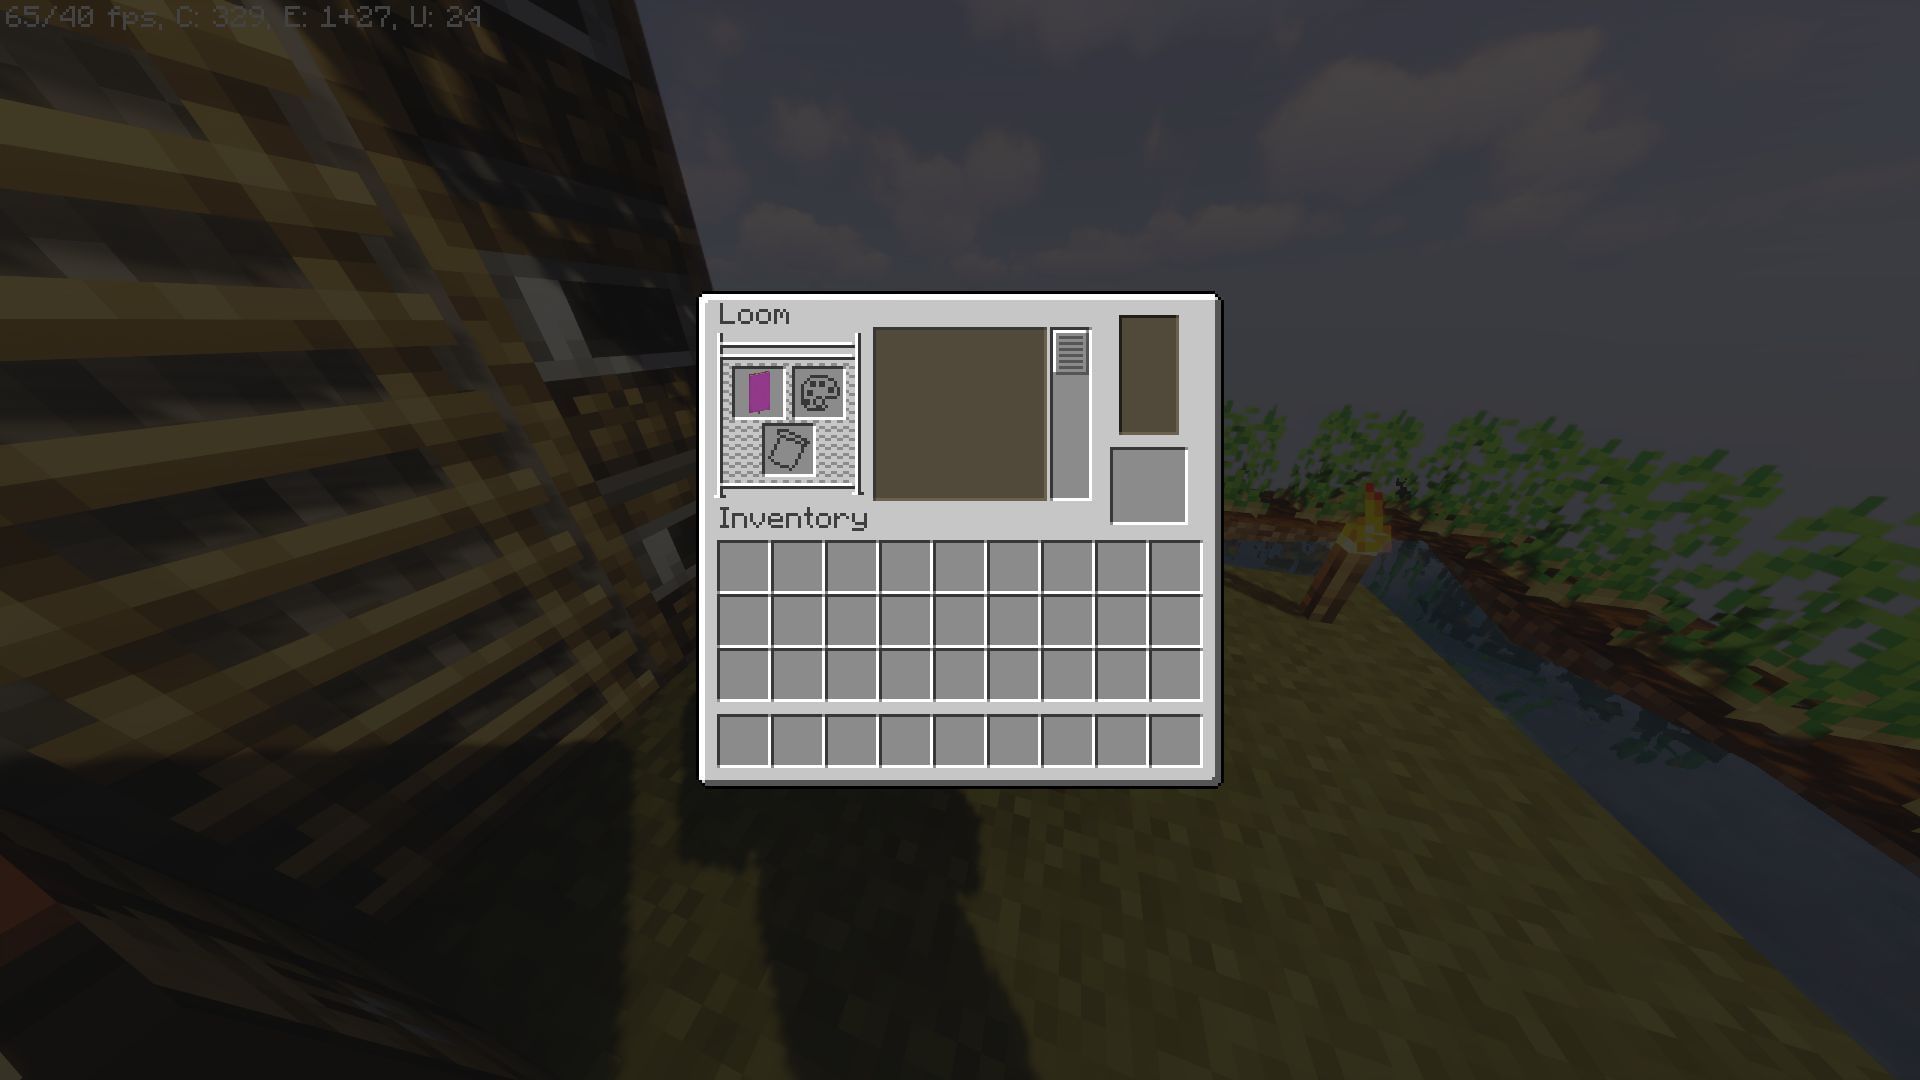
To craft a banner with a customized pattern, players need to have a banner and some dyes in their inventory and need to be near a Loom. There are three slots in a Loom, and each slot has its own purpose.
Next comes the crafting process, which is carried out in three steps:
Step 1: The banner needs to be placed in its designated slot in the Loom. This will serve as the basis for where the pattern previews appear, which will be in the slot on the right. A visual representation is shown below.
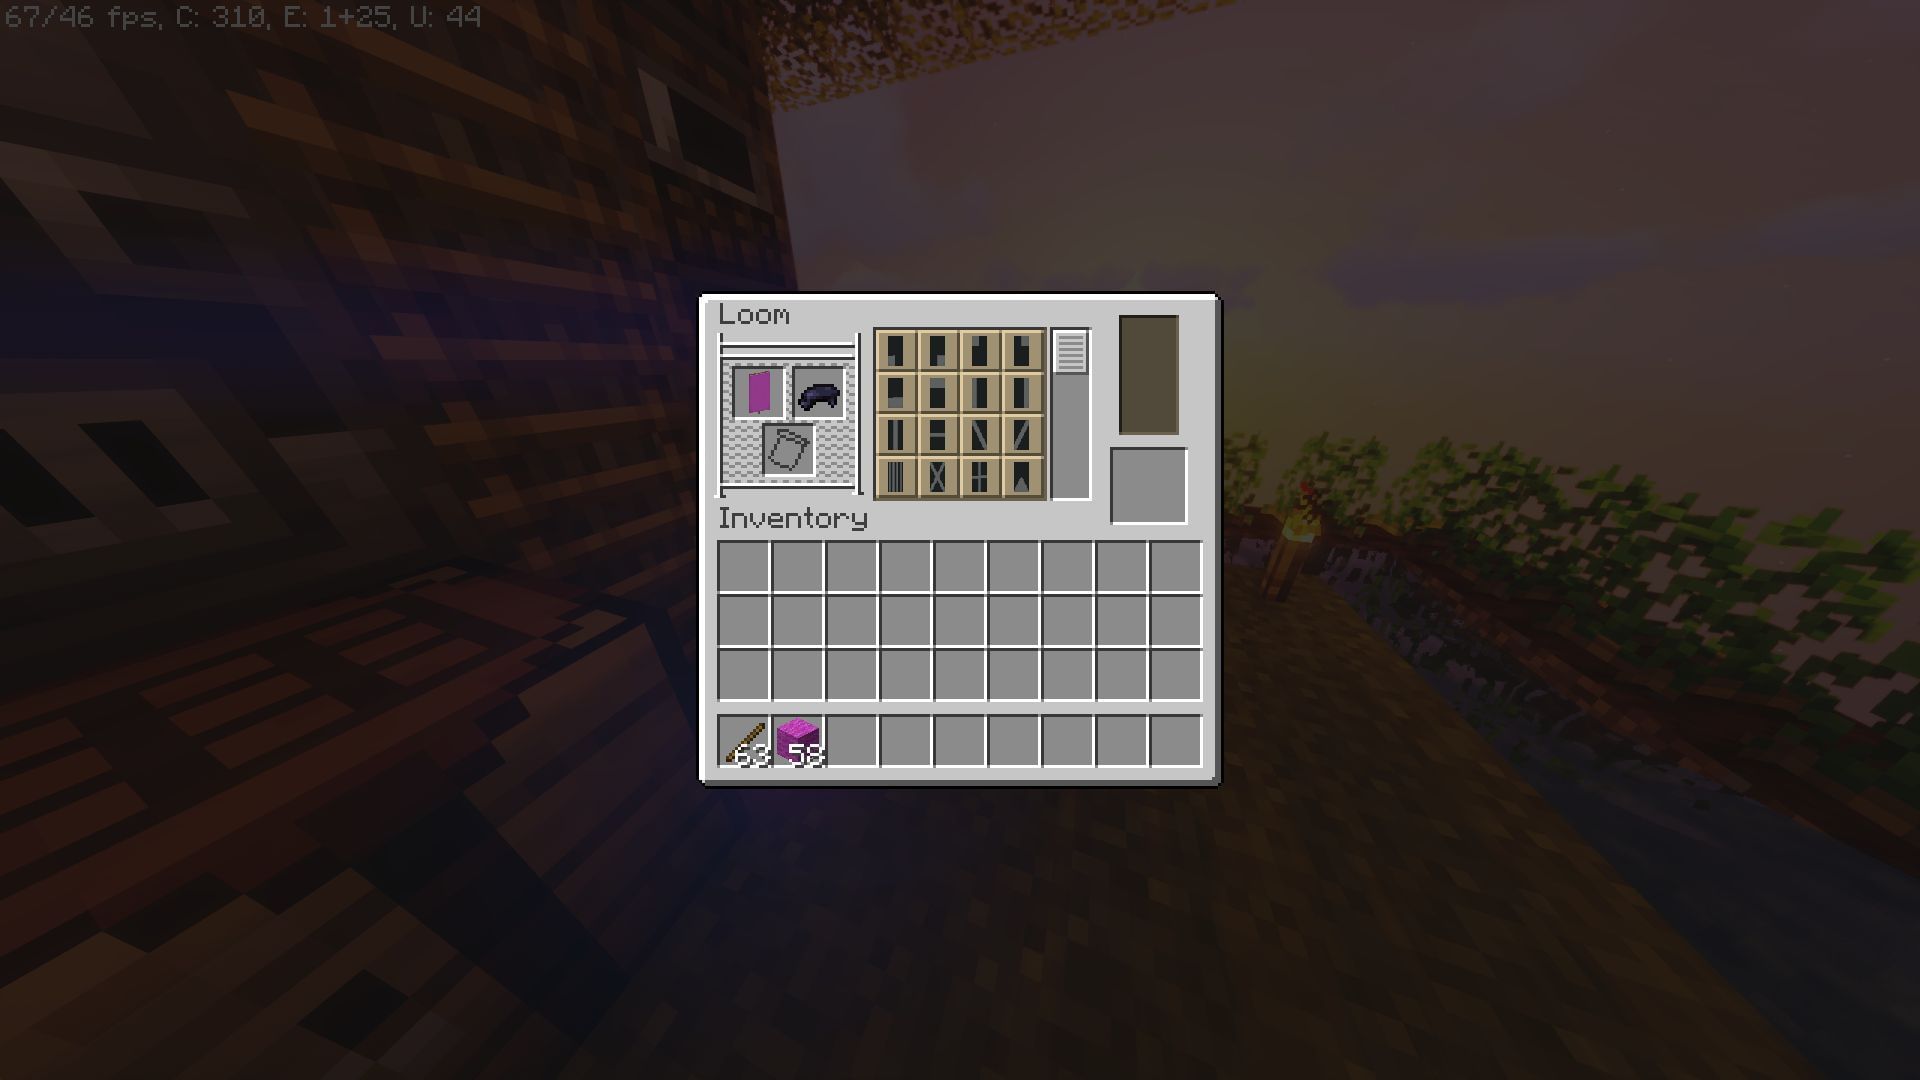
Step 2: The dye in which the patterns will be colored is to be placed in the second slot which can be identified by the color palette icon. Doing this will prompt the Loom to display a plethora of pattern previews for the banner. Clicking on any one of the previews will display what the resulting banner will look like if the player decides to apply that particular color and pattern to the banner. The process is pictured below.
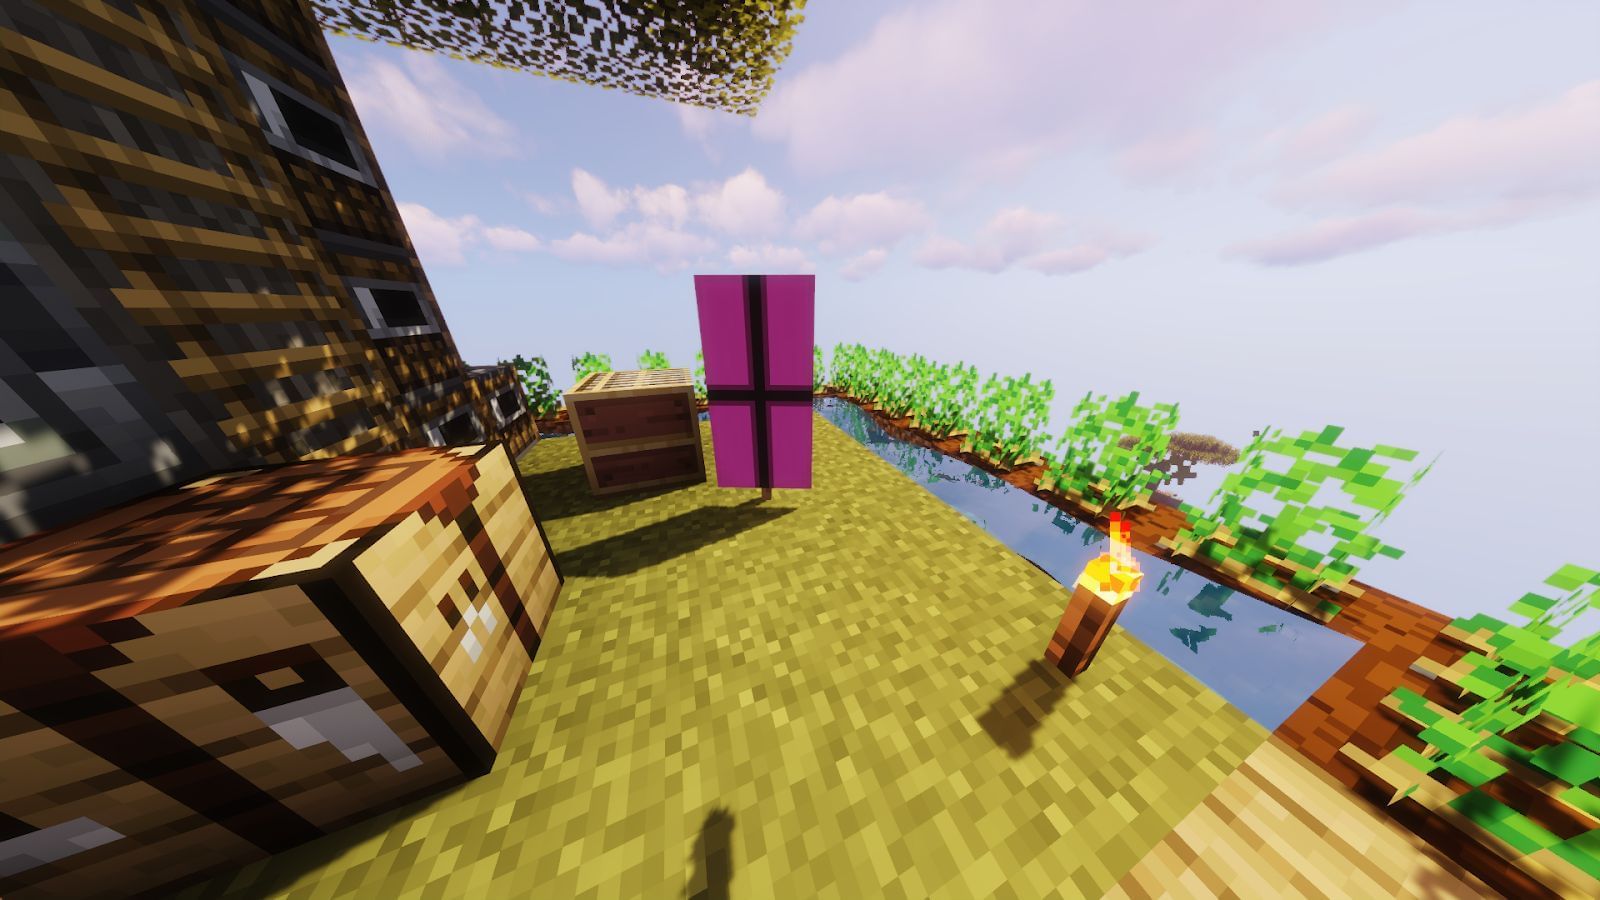
Step 3: Clicking on the resulting banner with the newly applied pattern will allow the player to start using it or put it in their inventory. Banners, as stated above, can be applied to walls or shields, and can also be placed on the ground.
Six exclusive banner patterns can be applied as well. However, players are required to find them or craft them first. For example, the “Creeper charge” banner pattern can be crafted with a Creeper head and a piece of paper.
Obsessed with Crosswords, Wordle, and other word games? Take our quick survey and let us get to know you better!
